You sit down to write your first blog post and freeze. The cursor blinks. You type a sentence, delete it, type it again, and forty minutes later you have a title and a headache. Meanwhile, some creator in your niche publishes every week and ranks for everything.
Here’s the truth nobody tells beginners. Writing a blog post is a process problem, never a talent problem. The people who publish consistently follow the same steps every time: pick one topic, outline it, draft fast, edit slow, format for scanners. The blank page only wins when you skip the steps before writing.
This guide shows you how to write a blog post from first idea to publish button, in nine steps. It’s written for course creators, so every example connects back to attracting students, but the process works for any blog. If you haven’t mapped out what you’re publishing yet, start with a content marketing strategy and a content calendar, then come back here to write the posts themselves.
TL;DR
- Pick one topic that answers one question from one reader. Posts aimed at everyone reach no one.
- Check what already ranks for your keyword before writing. The top results tell you exactly what readers expect.
- Outline first. Your bullet points become your subheadings, and the blank page problem disappears.
- Write a working headline early, draft the body fast without editing, then edit in two separate passes.
- Format for scanners with short paragraphs, clear subheadings, and visuals. Most readers scan before they read.
- End every post with one next step, like joining your email list. A blog post without a call to action is a dead end.
What Makes a Blog Post Good?
A good blog post answers one specific question better than anything else the reader can find. That’s the whole standard. Length, design, and clever writing all matter less than whether someone leaves with their problem solved.
For a course creator, a good blog post does one more job. It proves you can teach. A yoga instructor whose post finally fixes someone’s wrist pain in downward dog has just auditioned for that reader’s money. The blog is your free sample, and the course is the paid version.
Keep that in mind through every step below. You’re never writing to fill a content calendar. You’re writing to show one future student that you can get them results.
How to Write a Blog Post in 9 Steps
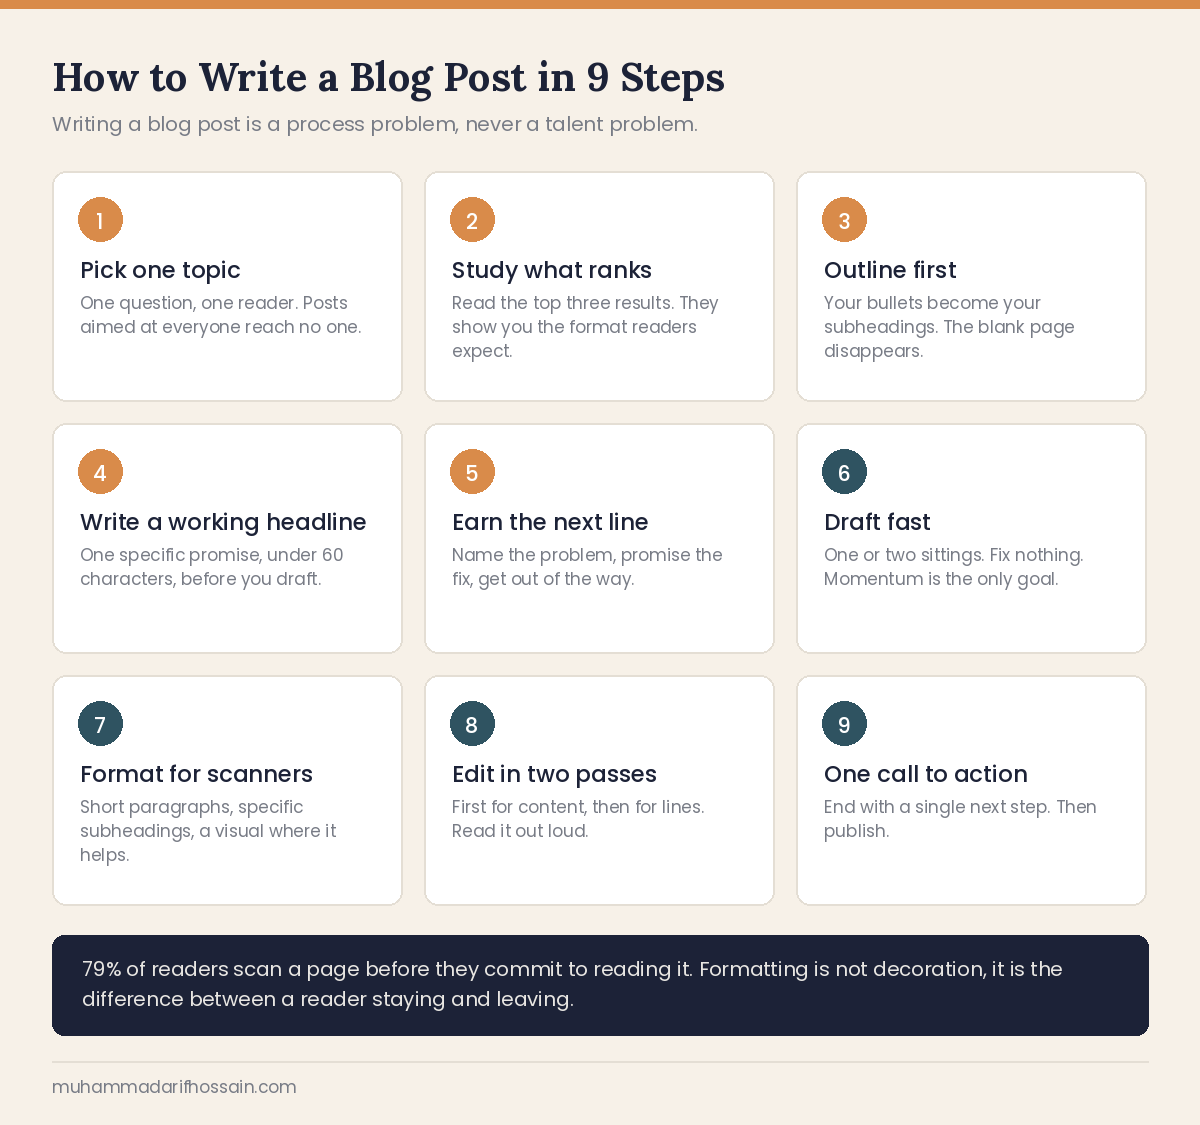
Here’s the full process, from picking a topic to hitting publish. Follow the order. Most beginner struggles come from writing first and planning never.
Step 1: Pick One Topic for One Reader
Every strong blog post starts with a question a real person is asking. A problem they want solved, a task they want done, a decision they can’t make. Your job is to pick one and refuse to widen it.
The fastest source of topics is your own audience. Questions from students, comments on your videos, emails you keep answering. If three people asked you something this month, hundreds are typing it into Google.
Common mistake to avoid: Choosing a topic because it interests you instead of your reader. “My thoughts on online education” attracts nobody. “How long should an online course be” attracts exactly the person who might buy yours.
Step 2: Study What Already Ranks
Before writing a word, search your topic and read the top three results. This takes twenty minutes and shapes everything. The results show you what Google believes searchers want: a step-by-step guide, a list, a comparison, or a quick answer.
Match that format, then beat those posts on substance. Look for the questions they leave unanswered, the steps they rush through, and the experience they clearly don’t have. Those gaps are your post.
Where this matters most: Competitive topics. If every top result is a 2,000-word guide, your 400-word take won’t rank no matter how sharp it is. Know the bar before you decide to jump, and understand how on-page vs off-page SEO splits the work before you assume writing alone will get you there.
Step 3: Outline Before You Write
List the main points your reader needs, as plain bullets. Arrange them in the order someone would naturally need them. Cut the weak ones. Those surviving bullets become your subheadings, and suddenly you’re never facing a blank page again, just filling in sections.
Darren Rowse of ProBlogger builds every blog post this way, treating the outline as the bones and the draft as the muscle (source). It’s the single habit that separates people who publish weekly from people who have five half-finished drafts.
Then pressure-test the outline before drafting. Would your ideal student actually find this useful? What question will they still have at the end? Fixing a weak outline takes five minutes. Fixing a weak finished draft takes hours.
Step 4: Write a Working Headline
Draft your headline before the post, not after. A working headline forces an angle. “How to price an online course” and “How to price your first online course when you have no audience” produce two very different posts, and the second one knows exactly who it’s for.
A useful headline makes a specific promise: what the reader gets and who it’s for, in under about 60 characters so search results don’t cut it off. Numbers and clear outcomes help. Cleverness usually hurts, because clever headlines make readers guess.
Common mistake to avoid: Treating the working headline as final. Come back after the draft and sharpen it against the finished post. The best headline is usually written last, from material the draft gave you.
Step 5: Write an Introduction That Earns the Next Line
Your intro has one job. Convince the reader they’re in the right place. Do it in three moves: name their situation so they feel seen, promise what this post will solve, and get out of the way. Three or four short paragraphs, maximum.
Start with the reader’s moment of frustration, a surprising observation, or the short version of your answer. Skip warm-up sentences like “In today’s digital world.” Every reader has read a thousand of those, and every one of them signals a post worth skipping.
Step 6: Draft Fast, Edit Later
Now expand each outline bullet into its section, and write the whole thing in one or two sittings without fixing anything. Drafting and editing use different parts of your brain, and switching between them mid-sentence is why posts take beginners ten hours.
Give yourself permission to write badly. Typos stay, clumsy sentences stay, missing words stay. Momentum is the only goal of a first draft. A finished bad draft can become a great post tomorrow. A perfect first paragraph attached to nothing cannot.
Write like you’d explain it to one student on a call. If you wouldn’t say “utilize” or “in order to” out loud, don’t type it. Your teaching voice is your writing voice, and it’s the reason readers will pick your course over a stranger’s.
Step 7: Format for Scanners
Readers scan before they commit. Nielsen Norman Group’s classic web reading study found that “79 percent of our test users always scanned any new page they came across” (source). Your formatting decides whether a scanner stays.
So make the blog post skimmable. Paragraphs of two to four sentences. A subheading every 300 words or so that says something specific. Bullets for lists, bold for the few lines that matter most, and an image, screenshot, or diagram wherever one explains faster than text.
Where this matters most: Mobile. More than half your readers will open the blog post on a phone, where a five-sentence paragraph becomes a wall. If the post looks dense on your own phone, break it up.
Step 8: Edit in Two Passes
Let the draft rest, overnight if you can, then edit twice. The first pass is for content. Does the order make sense, does each section deliver its subheading’s promise, and what can be cut? Most drafts improve by losing 10 to 20 percent of their words.
The second pass is for lines. Shorten sentences, replace vague words with specific ones, and read the post out loud. Your ear catches the clunky rhythm your eyes skip over. Then run a spell check, because one glaring typo can cost a first-time reader’s trust.
Common mistake to avoid: Editing forever. If you’ve done both passes and fixed the typos, the blog post is ready. Version seven is rarely better than version three, and the readers you’re polishing for can’t see a post that never goes live.
Step 9: Add the Call to Action, Then Publish
Every blog post needs one next step. For a course creator, the best one is almost always your email list. Offer a freebie that extends the post, like a checklist or a free lesson, and the reader who loved your advice becomes a subscriber you can teach every week. My walkthrough of conversion rate optimization covers how to make that handoff actually convert.
Add two or three internal links to your related posts while you’re at it, so readers and search engines can find the rest of your work. Write a meta description that sells the click in about 105 characters. Then publish.
One CTA per post. Ask a reader to subscribe, comment, share, and check three other posts, and they’ll do none of it.
Common Blog Writing Mistakes to Avoid
Writing for everyone. A post about “productivity tips” competes with the entire internet. A post about “productivity tips for teachers grading at night” competes with almost nobody and speaks straight to its reader. Narrow always beats broad for a small blog.
Publishing without a next step. A great blog post with no CTA sends a warm, convinced reader back to Google. That’s the most expensive traffic you’ll ever waste, especially when your course is one signup form away.
Chasing word counts. Padding a 1,200-word answer into 3,000 words makes the post worse, and readers feel it instantly. Cover the question fully, answer the follow-up questions, and stop.
Publishing once and moving on. A post’s life starts at publish. Share it, mention it in your newsletter, link to it from new posts, and refresh it when the information ages. One updated post often outranks five new ones.
Waiting until you feel ready. Your tenth blog post will embarrass your first, and that’s the point. The only way to write better posts is to publish worse ones first.
A Simple Pre-Publish Checklist
Run every blog post through this before it goes live.
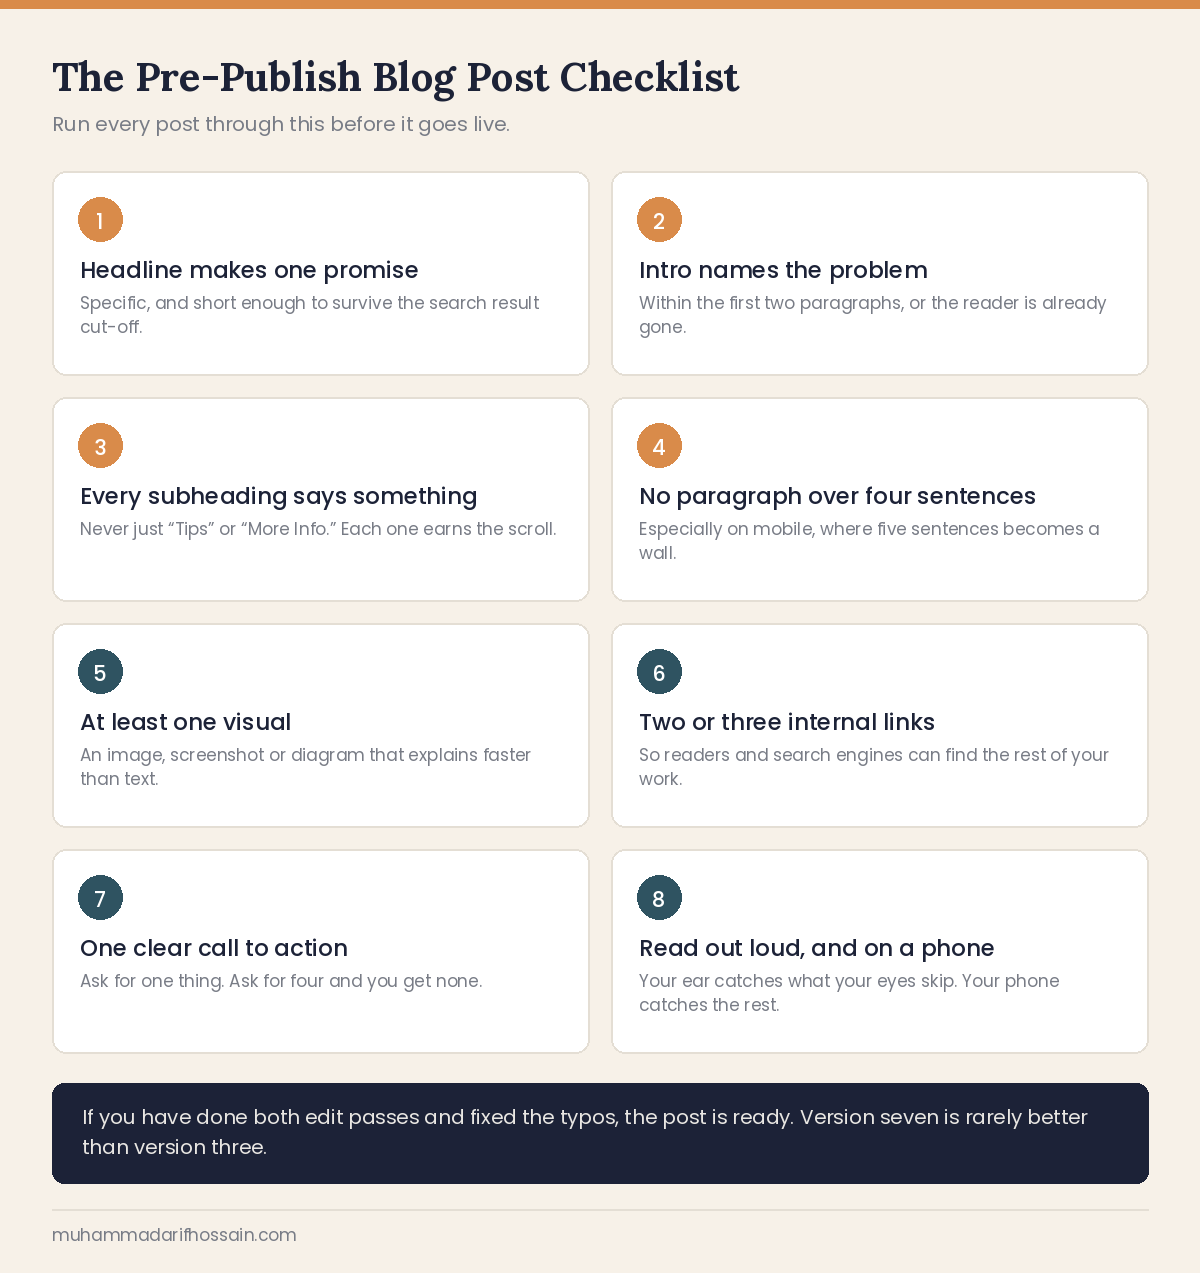
- The headline makes one specific promise and fits in about 60 characters
- The intro names the reader’s problem within the first two paragraphs
- Every subheading says something specific, never just “Tips” or “More Info”
- No paragraph runs longer than four sentences
- At least one image, screenshot, or example supports the main point
- Two or three internal links point to your related posts
- One clear call to action ends the post
- You’ve read it out loud once and on your phone once
Related Guides
- Content Marketing Strategy: 8 Steps That Actually Work
- How to Build a Content Calendar: 10 Steps and Mistakes to Avoid
- On-Page vs Off-Page SEO: The Difference and Best Place to Start
- Link Building Strategy: 57 Links, No Budget, and Traps to Avoid
- How to Become a Digital Marketer: An Honest Roadmap for 2026
Stuck on What to Publish Next?
Knowing how to write a blog post is one skill. Knowing which posts to write, in what order, so they actually compound into traffic is a different one, and it’s where most blogs stall out.
I run full-funnel marketing for WordPress and SaaS products every day, content strategy included. If you want a second pair of eyes on your blog, your topic list, or why good posts aren’t ranking, reach out here. I read and reply to every message myself.
Frequently Asked Questions
How long should a blog post be?
A blog post should be as long as the question demands, which usually lands between 1,000 and 2,000 words for how-to topics. Check the length of the top-ranking posts for your keyword and treat that as the bar. A complete short answer always beats a padded long one.
How long does it take to write a blog post?
It takes most bloggers three to five hours to write a solid post, spread across outlining, drafting, and editing. Beginners often need longer, and that’s normal for the first ten posts. Splitting the work across two days, drafting on one and editing on the next, makes the hours feel far lighter.
How often should I publish blog posts?
You should publish at whatever pace you can sustain for six months, and for most course creators that means once a week or once every two weeks. Consistency beats volume, since search engines and readers both reward a blog that shows up reliably. One strong weekly blog post outperforms four rushed ones.
Can I use AI to write my blog posts?
You can use AI for outlines, research summaries, and first drafts, but the teaching should sound like you. Readers buy courses from a voice and perspective they trust, and generic AI text builds neither. Treat AI output as raw material to rewrite with your own examples, opinions, and experience.
Do I need SEO to write a good blog post?
You don’t need SEO to write a good post, but you need it for strangers to find one. Start with the basics: one target keyword, a clear headline, subheadings that match what people search, and internal links. Write for the reader first, then adjust for search, never the reverse.